Sunday, April 4, 2021

What is Headlight Restoration

Having Headlights Restored

Headlight restoration, when done right, can mark the difference between a functional and dysfunctional headlight.

Did you know that faded headlights are in fact, illegal and unsafe?

In fact, vehicles with faded headlights won’t pass a roadworthy certificate.

This will deem the vehicle illegal for road use.

Opaque headlights will reduce your visibility at night up to a massive 75%.

Replacing headlights is expensive and in most cases not necessary.

Yes, you can fix them yourself, it’s also recommended that you find a professional car detailer to help you fix the problem.

But what does headlight restoration really mean?

headlight restoration done

WHY HEADLIGHTS DISCOLOUR

As vehicles age, the plastic headlight lenses deteriorate due to abrasion and permanent Headlight Restoration & Repair Specialists Our Technicians UV damage.

The headlights become a dirty yellow colour with an opaque surface.

This surface damage can dramatically reduce the light output and make headlights less effective if not treated early.

In climates like Brisbane, our tropical climate damages porous surfaces like the plastic that makes headlight lenses.

A common myth is that headlight deterioration happens on the inside of the lens. This is not true, the damage is all on the outside.

There are two different types of headlight lenses – Plastic and Glass.

Glass Headlights

Glass headlight lenses do not deteriorate like plastic, but they chip and crack and need replacing.

In the ’90s glass headlights were phased out and replaced with polycarbonate so the only glass headlights are on older-style cars

Polycarbonate Headlights

Headlights on virtually all cars are now made of polycarbonate. It is an extremely tough plastic that is also porous and discolors in UV rays. The fading that we see is called Oxidation, and this also occurs on the paintwork of our cars.

To prevent oxidization to the polycarbonate, headlight manufacturers apply a protective hard coating to the outside of the lens to seal and protect the headlight and plastic from discoloring.

Over time, this factory protective clear hard coat degrades (oxidizes) and needs to be removed entirely and replaced with another quality protective clear hard coat that lasts.

Benefits Of Headlight Restoration

Modern-day headlights are made from a polycarbonate plastic material. Even though this makes them sturdy and durable, the main downside is the oxidation that happens over time from UV rays

In warmer climates, this leads to cars needing headlight restoration more often than cars in cooler climates. Below are some of the main benefits ofcleaningyour headlights once you notice they’re dimming or turning yellowish.

  • Enhance road safety:Dull and dim headlights means impaired vision while on the roads. If you do regular night driving, this is a safety concern.
  • Help to maintain your car value:When there’s a fault in your car, the value goes down. To keep your car roadworthy, you will need to keep your headlights maintained.
  • Saves you money:Restoring discolored headlights means fixing the ones that are already in place. This costs less than having to buy a new one from the stores.
  • Improves your vehicle’s aesthetics:Dull and yellowish headlights give your car a boring look. However, by restoring the headlights, you can give your car a whole fresh appearance.
  • Increase visibility:oxidized headlights dull the light that is being emitted. However, restoring the headlights will give you sharp new vision at night

headlight restoration

What To Check For When Researching Headlight Restoration

Many low-cost headlight restoration services only remove the degraded factory protective clear coat.

This is polished off and it leaves the unprotected plastic lens bare.

Within months the unprotected headlights will start to discolor and develop ‘crazing’ or tiny cracks in the lens surface.

Doing this headlight restoration method removes all the protection that stops the lens from being damaged by UV rays.

The headlights are covered with this coating to protect it for this reason.

Doing machine buffing on your headlights is a short-term fix and will cause permanent damage to the lens as it is left unprotected.

Don’t Take Short Cuts

A correct Headlight Restoration is when the car detailer completely removes the old degraded factory clear coat. The headlight is lightly polished and then the surrounded areas of the car are masked up.

The headlights are sprayed with a protective coating and this cures to create a new protective clear coat that etches into the polycarbonate.

It creates a ‘rock hard’ protective clear coating which is also chemical resistant, non-yellowing, and lasts as long as brand new replacement headlights.

How To Restore Headlights

There are two ways to restoring your headlights.

One, you can do it yourself, or two, you can hire a professional car detailer.

If you are going to do it yourself, be sure to buy a proper kit.

There are some old wives’ tales for cleaning headlights, and one of those is that toothpaste is good for cleaning headlights.

Now, this method used to work on glass headlights. Toothpaste is gentle abrasive but should not rub any abrasives on your headlights as you are wearing down the much-needed sealant that protects the lens.

When the coating is damaged it needs to be removed entirely and replaced. Don’t add further damage with a mild abrasive like toothpaste

We recommend you find a car detailing specialist to help you out rather than trying to do it yourself

But If you decide to do it yourself, here are the steps to take;

You will need to buy a headlight restoration kit before you start.

  • Wash the car.
  • Tape up the edges surrounding the headlight.
  • Use sandpaper to remove the cloudiness on the surface
  • Use the supplied polish to smooth out the lenses.
  • Apply any supplied final coatings and follow the instructions

Wrapping it up

Keep your car roadworthy and provide better night vision while you are driving by getting a specialist to check them out and advise you appropriately.

Once you notice your headlights are dim, foggy, have a dull haze, or are turning yellowish, this would be the signal to book your car in for a car detail and headlight restoration service.

When you combine the 2 services, your car will look new again with polished paintwork and bright new headlights.

We are your local headlight restoration and repair experts. Please contact us to learn more about our car detailing Brisbaneservices

The Article What Is Headlight Restoration First Appeared ON

: https://limitsofstrategy.com

Wedding Makeup Tips

Wedding Make up Tips

Looking for wedding makeup tips before your big day?

Then you’ve come to the right place because we’ve compiled the best wedding makeup tips that will help you look flawless no matter what your wedding budget is.

Just say “yes” to the following bridal makeup rules and prepare to shine!

wedding makeup artist

The Wedding Makeup Dos:

Take Care Of Your Skin

An in-depth day and night skincare routine are essential at least 3-6 months before your wedding date to make sure your skin is ready for the big day!

This helps with how the makeup looks and stays on your skin all day.

Make a trial appointment 3-5 weeks before your wedding.

Make sure you have your trial at least three weeks but no more than 5 weeks before your wedding. If you are planning to have a spray tan on your big day, do a test run before your makeup trial, so your artist can see what color your skin will get from the tan,

Be your best self on your trial day. Feel your best on your trial day. Make sure your hair is done, and you’re wearing jewelry so you can see how the overall look comes together on the day.

Wear a light-colored top in a similar tone and shade to your wedding dress. If you have your makeup tested in a store so you can see how the makeup looks against it, and take a photo of yourself in daylight (without flash) to see how it looks before you buy anything.

Accentuate Your Eyes

Brighten up dark areas under your eyes with correctors and concealers.

It’s all about choosing the right shade to match your eye color.

Your eyes should be the focus, not the actual makeup.

A trick to make your eyes pop is to keep color intensity as close to the lash line as possible. Fake lashes also play a big part in creating the pop without requiring heavy eye makeup.

It is always about “lashes and liner.”

Bring References To Your Trial.

Look for pictures of the makeup you really like and bring them to your appointment.
Try to figure out what you like about the makeup in the image and keep in mind that Kim Kardashian’s makeup may not translate to you if you have Dita Von Teese’s skin tone.
Look for faces that have similar coloring and features as you so you can have a similar look created for you.

Wedding Makeup Tips

Consider Colour

Remember that bridal makeup needs to have enough color to balance out the whiteness of the dress. There’s a big difference between everyday wear and a wedding dress, so there should be a difference in your makeup, too.
Start by making sure your skin tone looks even and smooth, then add color to your cheeks and lips to make them glow.

Use Individual False Eyelashes.

They’re a brilliant way to make your eyes stand out and look much more subtle than a full strip. Choose different lengths to create a really natural, fluttery look and nestle them in between your natural lashes rather than pinning them on top.

Don’t skip the basics.

Spend time and care on the most important features of your face, like beautiful, natural-looking skin, gently groomed brows, and feathery lashes.

If you get these fundamental factors right, the rest of your makeup will take care of itself.

Research Makeup Application methods

They can be slightly different from your daily makeup routine.
For example, If eyeliner pencils always smudge because you have oily eyelids. Try working with a dark eye shadow, apply it with a slightly dampened eyeliner brush to make it like a pencil liner but with better staying-power.

Wedding makeup tips

Go Pro

The best wedding makeup should last as long as your day. That’s why professional products should be used – foundation, concealer, lip, and eye products. They offer superior durability to see you through your wedding day and night.

Accentuate The Brow Bone

Complete your makeup look with a subtle highlighter shade on the brow bone to really bring out the eyes.

Choose a light, matte shade and dab it on the outer corner of the brow bone to draw attention to that area of your face. Do not go for a shimmer or shine. It can make you look sweaty or oily in the photos. Trust us on this tip!

Take A few Touch Up Products

Ensure you or a bridesmaid have a powder, lipstick, concealer, and a small brush or sponge in your bag.

These are products you can quickly touch up to ensure you look confident throughout the day.

Wedding Makeup

The Wedding Makeup Don’ts:

Have your makeup tested anywhere there are fluorescent lights

If a professional makeup artist is coming to your home, arrange a time when it’s still light outside.

Let A Makeup Artist Steal Your Identity.

For many people, their wedding is when they can be really excited to have someone else do their makeup.

Still, there can be a temptation to just give in to the experience and take the suggestions from the makeup artist – They do not know you that well, and you may not feel like you.

We would advise real caution here; you don’t want to surprise your chosen one at the altar by showing up looking like someone else.

Whether you hire a makeup artist or do your own, we believe that the best bridal makeup is simply the most exquisite version of what the bride normally looks like – after all, you want to look beautiful, not your makeup.

Don’t Wear SPF

If you’re being photographed with flash, don’t wear SPF sunscreen because the flash can bounce off your skin and make you look washed out. Be sure to test this on your test shot by taking a photo with the flash on.

Wearing Too Much

It’s an absolute myth that your makeup needs to be applied for photos.
Many wedding photos are taken in natural light, and if you choose a heavy base, the makeup will look obvious.

As for the flash, you just need to make sure your T-zone is matte, which you can achieve with fine translucent powder and blotting powder, not layers of makeup.

Anything Too On-Trend

Remember, you will be looking back on your wedding photos for the rest of your life. Don’t look back at them and wonder, “What the hell was I thinking!”

So it’s best to avoid statement looks and opt for something timeless and classic.

That glitter eyeliner and cut crease look that you saw on a Youtube tutorial might look super pretty and modern.

In twenty years, it will probably look tired and dated! Some looks never go out of fashion – think of the classic red lip or a beautiful winged eyeliner – It is timeless.

That doesn’t mean you have to go for a symphony of beige tones if you’re used to bolder makeup – vintage wedding gowns, in particular, can look stunning with a classic Old Hollywood lipstick color.

Don’t Be Afraid To Go A Little Lighter.

Neutral, brown, and pale lip colors can look washed out in photos, so choose a lipstick that’s a shade or two lighter than what you normally wear.

If you usually wear a neutral shade, it should be worn as a base, with a pink or rose color on top. If you usually wear dark lipstick, use it as a base, and apply a lighter pink over it to spice up the color.

Pink tones such as roses and plums are all great, classic colors for brides.

Apply Makeup To The Face Only

Instead, sweep it down your neck and over your shoulders if necessary. This will ensure your face isn’t a different color or even texture than your body.

Everything should look even for the most natural look possible.

A great way to blend uneven skin tones together is to use a light fake tan. Do this the day before the wedding, not at night, and beware of darkening your skin tone too much, as this will make your complexion look less natural.

Natural wedding makeup

Long Wearing Makeup

Forget to decide what kind of care you would prefer for the day

Do you want to check that you look good throughout the day, or do you just want to forget about your makeup as soon as it’s applied?

Waterproof mascara is an obvious requirement, but it’s also worth considering many cream eyeshadows are long-lasting, and you can be sure they’ll stay where you put them.

Making Your Eyes Too Dark

Define your eyes by applying color in the eye crease, but avoid using a shade that’s too dark or doing too much contouring in the eye socket line. It can distract from the eyes themselves.

Too Glossy Or Too Matte

It’s best to avoid lipsticks on either end of the texture scale; too glossy, and they’ll only last five minutes, while too matte can leave your lips dry and cakey when it’s time to kiss your groom.
A moisturizing, satin lipstick is best for a wedding – this type of formula makes your lips look their best and goes on most evenly and naturally; several thin coats dabbed on in between for an extra long-lasting finish.

Get The Timing Right

Remember to allow at least 45 minutes to an hour for makeup application on your wedding day.

Now relax – You have everything planned. Remember if you are not confident with hair and makeup, there are many mobile makeup artists and hairstylists that can come to you on your special day

The Article Wedding Make up Tips First Appeared ON

: https://limitsofstrategy.com

Sunday, March 7, 2021

Ceiling Repairs Brisbane Plasterer

Brisbane Plasterer

(07) 30640686 ​

19 Pleasant crt Cleveland Qld 4163

https://brisbaneplasteringtier2.s3-ap-southeast-1.amazonaws.com/brisbane+plasterer.html

Plaster Ceiling Repairs

A sagging ceiling is an indication that the ceiling is at risk of falling.
It is a hazardous building condition and the ceiling can collapse with no warning.
Falling ceilings weigh a lot!
Plasterboard is heavy and it will do a lot of damage to the room and cause injuries to people who are under the collapsed areas.

repair ceilings

Sagging Ceiling Repairs

Often they can start sagging and cracking without a home owner noticing.
Sometimes there will be an indication like white plaster flakes from the damaged ceiling being found on the floor
Other signs that you may notice are:

  • Sagging or cracking
  • Small round circles (these are screws popping)
  • Water stains or patches on the ceiling
  • Swollen or bubbled areas
  • Dark patches or mould growth
  • Areas of moisture or ‘sweating’

All of these are indications that you need to call a plasterer in to asscess what is happening and get it repaired.

Home Owners With Damaged Ceilings

Sagging ceilings occur because the gyprock board is coming away from the structural joists.
Sagging ceilings do happen in the ageing process of any building, and all home and business owners should be watching for signs of sagging.

When it comes to a ceiling repairs, the ceiling isunstable and it’s time to have a professional ceiling fixer look at it.
If there is by water damage due to a storm or a burst pipe, you can often get your home insurance to cover the repairs.

Tenants With Damaged Ceilings

If you are renting a residential property or a commercial property and you’re noticing the signs of a sagging ceiling. You do need to make a report to your property manager.
They will come an assess the damage and arrange for the repairs to be made.
Do not ignore the signs as a damaged ceiling can collapse with no warning.
If the ceiling has had water damage – You do not want to allow it to continue as ceilings are a great place for mould to take hold and start to spread.
Mould growing in the roof cavity will not be noticeable until it is a real problem.

Damp Ceiling Repair

Water damage is one of the main reasons why a ceiling will need to be repaired.
Plasterboard and water do not mix.
Water weakens the plasterboard and will cause it to swell and weaken
Plasterboard sheets are made up of layers of paper and gypsum – neither of these materials are designed to get wet.
Mould will also set into a damp ceiling and this alone can cause serious health concerns as the mould spores are breathed in by the building’s occupants.

Water Damage Or Insurance Work

Your ceiling can easily get wet in Brisbane through a storm.
Water has flooded the gutters and it can be forced up under the gutters into the roof cavity.
Or there may be damaged tiles on the roof. – This often happens if you have had tradesmen on your roof doing repairs such as installing a TV aerial or roof cleaning and resurfacing or when you have had gutters cleaned.
Tiles have been cracked when a tradesman has stepped on one.
You will not know there is roof damage until there is a storm and you have water damage appearing on your ceiling.

Other ways that water can damage a ceiling is when there is a leaking pipe or a leaking air conditioning unit.
If you are seeing damp or wet patches on your ceiling, it’s not something you should easily pass up. In fact, it should definitely be a cause for alarm.
Continuing to ignore water marks on your ceiling, may result in significant ceiling repair costs and long-term problems.

To Repair Instead Of Ceiling Replacement

Repairs can be carried out in many different ways but it will depend upon what is causing the damage.
If the ceiling has a slight sag, you can propping up the ceiling and reattaching sagging boards to the joists.
Areas have had water damage can have the damaged section cut out and the area patched
All repairs will most likely require joins or cracks to be repaired and the ceiling will need to be repainted.

Fixing The Sag

This can be done on ceilings that have slight sags that have recently happened.
Adhesive is injected onto the boards and then the plaster is pushed back into place against the lath and secure it with forms.
This step spreads the adhesive so that it bonds to a greater surface area.

The forms are left in place for a minimum of 24 hours so the glue will set.
Screws can also be added for extra strength.
If the sag is is considerable or it has been like that for considerable time – We do not recommend trying to repair it.
You are battling with gravity and heavy boards are not always going to hold with this method for a length of time.
It can be easier and even cheaper to demolish the ceiling and replace it.
You are then guaranteed of workmanship in this case.

Professional Plastering Work

There is going to be an inconvenience when repairing or replacing ceiling damage.
It will be very dusty when the gyprock sheets are removed and the roof cavity and insulation are exposed.
But once this is demolished and removed, the entire replacement work is done quickly as the plasterboard sheets are large and easy to shape and fix into place
All repairs will require repainting of the entire ceiling.
You cannot just paint one areas as it will not blend.
After the repairs and completed and the ceiling replaced, it will be a noticeably large improvement in how the room looks and feels. It will be lighter and look larger.

ceiling repairs

With our team of experienced plastering contractors, we are sure to give your good and quality plasters for your ceiling not just for a firm structure but a long lasting period of time.

We can repair or replace that sagging ceiling in your home or workplace.

The best news is that all of these services and more are available at an affordable price!
So if you are resident in Brisbane and you need to get your sagging plaster ceiling repaired or replaced, then look no further than the Brisbane Plastering Team

The Article Plaster Ceiling Repairs First Appeared ON
: https://gqcentral.co.uk

Monday, February 22, 2021

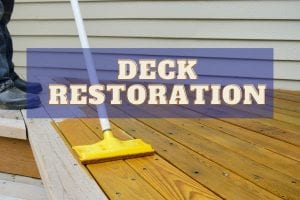
Deck Restoration Guide

A Step By Step Deck Restoration Guide

A deck is an important part of many Australian homes and adds to our way of life.
They add an extra living space and utility area to your house.
It can be a great place to enjoy fresh air and sunshine in the mornings.
A deck is also be a place to hangout with family and friends to enjoy BBQ’s and parties in the afternoon or evening.

Because of its exposure to harsh elements like the Australian sun, your deck needs routine maintenance that addresses any damage.
This upkeep will protect your outdoor areas and prevent more significant deck problems in the future.
It will also keep the deck in great condition for many years.
Deck restoration is one of the best ways that you can use to improve the appearance of your old deck.

decc care and maintenance

Here is a step by step guide to restoring your outdoor space.

  1. Inspect The Deck’s Surface

The impact of harsh weather conditions, including UV rays, high heat, and rain, can damage your deck structure.
Before starting your deck restoration project, it’s essential to start by thoroughly inspecting your deck surface.

In this step, you’ll look for any loose deck boards. You can also check if there are structural component issues such as rotting or split boards. It is a good idea to also check railings or the pergola to see if these need to be repaired at the same time

Use a leaf blower or a broom to remove any debris on the surface.
You can as well use a scraper to remove any dirt and debris trapped in between the deck boards.

  1. Lightly Clean Your Deck

The correct method of cleaning your deck depends on its finish and your end goals for restoring it.

If you’re restoring a deck that has been formerly coated with paint:
You may need to use a paint remover to strip off the paint. Then, clean and sand the surface before applying a new stain or finish
However, if you’re only painting, the process will involve cleaning, sanding, and then repainting.

Wear protective clothing such as gloves at all times to keep yourself safe from splashes and fumes
If your outdoor space is not painted but has a stain, you don’t need to apply a paint remover.
Just use a deck cleaner to clean the wood surface.

Oxygen-based wood cleaners are known to be the best and most effective cleaners for eliminating mildew stains.
These cleaners will also remove any graying caused by ultra-violet exposure.
Additionally, they will clean the wood surface, eliminating all dirt and deposits.

  1. Deep Clean The Deck Using A High Pressure Cleaner.

Deep cleaning is a significant step in deck restoration.
A power washer can be a highly useful tool for deep cleaning a deck.
However, it can easily damage your surrounding outdoor entertainment area if it’s carried out incorrectly. Using excessive water-jet pressure or an incorrect sprayer technique can etch away the surface of the wood. It may also wreck some of your deck boards and surrounding paint work

When deep-cleaning your wood deck using a power washer, ensure that you use the minimum pressure that offers effective cleaning.
For softwoods like pine or cider, the recommended pressure is approximately 500 to 600 pounds/ square inch (psi). If your deck is made up of harder woods, you can use higher pressure which shouldn’t exceed 1200 to 1500 psi.

pergola for the pool

  1. Sand Your Deck

After you power-wash the deck boards, the wood fibres increase as they swell with water.
Once the wood fibres are dry, they may have extra splinters. For an effective sanding, you have to sand the entire area before staining.

Sanding your deck will be easiest if you use an orbital sander. However, the right sandpaper is vital to have excellent results. Sandpapers that are too fine leave the deck wood pores full of fine dust that prevents soaking of the stain.
Using a sandpaper that is too rough can damage the wood, particularly the softer woods like cider.

For the main deck boards, the ideal sandpaper grit should be 60 or 80.
You can use a sandpaper grit of 80 or 100 for the handrails.
After the sanding, make sure you sweep and vacuum all wood surfaces thoroughly. Avoid rewashing the deck as doing so might cause swelling to the wood grain and coarsen the sanded surfaces.

This step is very vital in the preparation so take adequate time in it to ensure your deck is entirely clean and has no damage or anything to stop the stain or paint from adhering to the wood.

Since sanding is a dusty process, safety equipment like wear some eye protection and a mask are a good idea

  1. Choosing The Timber Stain

Choosing the stain is one of the most significant steps in your deck restoration project.
There are various types of staining products.
One is the semi-transparent stains that permit the deck wood grain to be noticeable through the stain.
There are also opaque stains that dye the deck wood and conceal all the wood grain.

Additionally, you can find oil-based as well as water-based stains.
The water-based stains are known to offer easy cleanups.
However, nearly all experts will agree that most water-based outdoor stains have a shorter lifespan than oil-based products.

A quality oil-based stain is the most recommended stain for your outdoor area.
It’s an outdoor semi-transparent stain that soaks thoroughly into the wood grain.

Once applied, the final color of the stain may differ from the color brochure.
This can be due to the type of timber you have stained and many companies do have comparison charts to show the color examples on different timbers.

  1. The Stain Application

Applying the stain is the last step in your deck restoration project.
Ensure you use the right brush or roller to soak the stain into your deck’s timber surface.
The right brush or roller will also help to control the consistency and even application of your staining process.

Remember your deck must be completely dry before you stain it. It is critical to that your deck is left to dry for approximately two days before proceeding with the staining step.
Water present in the wood pores will stop the adequate absorption of the stain into the timber.

Deck restoration may seem like a big task and if it does seem like too big a job – Then there are many professional Brisbane deck builders that also do deck restoration.
If you are confident and have the time, then by simply following the above steps, you’ll make your old deck look like new once again.

The post Deck Restoration Guide appeared first on GQ Central.

Saturday, February 20, 2021

Is Pest Control Safe

Is pest control safe?

Pest control has changed significantly over the years, with regulations introduced in order to make it not only more effective, but much, much safer.

In the past, companies used Organophosphates, which are a type of pesticide that is highly toxic.
It is now deregulated and not used.
Many companies would these dangerous pesticides and spray everywhere inside a property using airborne chemicals to ensure total coverage.
Little to no consideration was given to the safety of it’s occupants.

Not only are pest control companies having to under go rigorous training and licensing requirements. They have also got tighter regulations about what products can be used within the home and around a home to control unwanted pests

pest contol safety

Strict Australian Guidelines

In Australia, the law states that all pesticides must be applied in accordance with strict product label directions.

With the advanced tools now allow a pest technician to accurately detect what unwanted insects and rodents are in a house
With this information, they know exactly where to apply the pesticide, and they can use as little as possible and still achieve the desired result.

Because chemicals are applied in a controlled manner and strategically placed within the property.
A home’s occupants are not exposed to the chemicals.
When powder or dust treatments are administered, they can accurately be placed.
Areas like wall cavities, roof voids, under kitchen cabinets and other areas that people and pets do not access.

Ask Your Pest Control Technician What Type Of Chemical They Will Be Using

The company in the lead up should be asking about your family and your pets.
Questions about health issues, such as asthma or any allergies

All pesticides which are used in households must be approved by the APVMA ( Australian Pesticides and Veterinary Medicines Authority ).

Only a true professional pest controller will have this kind of knowledge, and ask you questions such as what kind of pets you have, and adjust the kind of treatment for your house accordingly.

Of course, some chemicals are more toxic than others, however, we only use approved products with a very low mammalian toxicity.

Some products have been known to be more toxic towards cats, such as Deltamethrin.

Ask A Professional Company For Advice

If you a worried about your pets, a quick call to the vet about proposed application method in hand can give you peace of mind and help you decide how to proceed.

If you are pregnant, have a newborn baby or any health concerns that make you reluctant to seek pest control, call your doctor for advice.

Please note – pest control technicians are not doctors and cannot give you medical advice.
It is always best to seek the opinion of your health care professional if you feel uncomfortable.

If you require any additional safety info such as material safety data sheets of the products being used they should have them readily available for you to read them.
Pest control techs are experts in the products they use, and will be glad to explain anything that is confusing to you.

If the pest controller you speak to seems uninformed or uninterested in spending time with you or answering your question or concerns , consider it a red flag.
Consider calling other companies and ask your questions and find a company who can answer your questions.

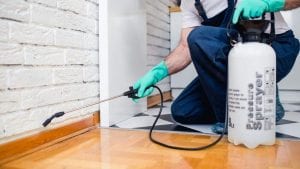
pest control spray

pest spraying Brisbane

Safety Guidelines Before A Treatment

What happens before, during, and after the treatment are just as important.
Here are some tips to increase the likelihood of a safe pest control session:

Talk to the pest control applicator about the pesticide to be used so you can prepare ahead of time. Let the company know about health concerns. You can mention pregnancy, allergies, and etc. so they can find the best treatment option.

  • Cover everything that can be exposed to the pesticide such as plates, toothbrushes, toys, cooking utensils, etc.
  • Stay away from the premises for four to six hours. Keep the pets away, too.
  • If the pesticide is applied outdoors, make sure all windows and doors are shut.
  • If the pesticide is applied indoors, open the windows and doors immediately once you return home.
  • Wash and clean everything again prior to using them, especially food utensils

It is also a EPA requirement that all pest control company’s keep record of pesticides used their amount and were they were applied as well as any weather conditions such as wind speed

Extra Steps That Maybe Needed

The company that you hire will have a set of their own guidelines they may ask to implement before the service.

There are 12 major pest types pests (including cockroaches, fleas, termites, mice and ants.)
A treatment is catered to the home, the pest type and extent of the problem.
You should be dealing with expert Pest Managers. They will give you the right advice on how to ensure your your home stays pest free.

They may also suggest things like:

  • Steam cleaning your carpets just before the treatment
  • Mowing your lawn if you are treating for fleas
  • Clearing away excess garden waste and mulch if you have suspected termites
  • A full house clean if you have cockroaches

Safe & Effective Pest Control in Brisbane

When you see the team arrive for the treatment, they should all be wearing protective clothing.
If you see someone in shorts and a t-shirt spraying pesticide, they are not professional!

The weather conditions need to be taken into account to ensure that the protection will work
Strong winds will blow away the treatments and heavy rainfall will wash away the products..

The other part of a safe pest control process, is to ensure there is a set time we will be there for the treatment.
You should be advised for how long to be away from your property to minimise the risk to you and your loved ones.

To find an experienced and professional pest control team – Call the Brisbane Pest Control Experts

The Article Is Pest Control Safe For My Family And Pets? First Appeared ON
: https://gqcentral.co.uk

Friday, February 12, 2021

After Having A Pest Control Treatment

Modern Pest treatments

Pest control has come a long way in the past 30 years.
Before the 21st century, many pest control companies were still using organophosphate, a class of insecticide that has since been de-registered for home-use due to being highly toxic. Fortunately, those days are long gone.

Nowadays, the products used are far more safe, eco-friendly, and gentle to use near humans and pets.

Brisbane Pest control experts are now able to provide targeted applications to pest problems faced around the home or workplace that minimise the potential of adults, children or pets coming into contact with any pesticide products used.

Stay away until the pest treatment is complete

Although it is not usually necessary, some people feel most comfortable taking their kids and pets out of the house during the actual treatment process. If this is the case, arrange to meet your tech afterwards or call the office to ask any last-minute questions. A good pest control company will be patient and understanding.

What Steps To Do After Your Pest Control?

After you have had a pest control treatment at your home and the home is free of pests.
Below are a few ideas to ensure a successful service result and keeping a pest-free home.

Pest control services suggest a certain time to stay away from the home once the work is completed.

1. Once the service is completed, they may usually recommend staying out of your house for a time of around 2-4 hours.
However, this may vary based on the type of service, and also extend up to a maximum of 24 hours.

2. Throw away any exposed food:Throw any food items that may have residue on them into the garbage. Pest services may use organic chemicals for spraying in the process, but still, you would not want to take chance on the health issues.


3. Wait till you clean.The majority of pest control services suggest waiting for around a week before cleaning your home. Different sprays and gels are applied to your surfaces so that insects who come into contact with them are killed. If you clean these surfaces, you are removing the treatment.

4. Look for any cracks or gaps:Cracks or gaps in in walls, vents ot around frames are how many psest enter a home. These also give access into wall cavities. Repair any possible entry points to stop them entering again

5. Clean up paper as itis a source of food for many kinds of pests. Ensure to eliminate any kind of paper like old newspapers, wet papers or any brown paper carry bags especially those which are near to the kitchen or bathrooms.

6. Safeguard yourself when you come in direct contact of treated surfaces for the first time after the treatment ensure that you wear disposable gloves and do not touch anything with bare hands.

7. Keep looking for pests in the days following the treatment, you will see a lot of dead pests around the house and this is what you want. Clean up the dead insects to prevent more insects being attracted to them. You also don't want your pets to ingest the poinsoned bugs

8. Keep your garden neat and tidy around your home and if you have had a flea treatment, keep your lawn mowed. This will help to stop unwanted pests being attracted to dense vegetation and organic matter up close to your home.

If concerned, ask a professional for advice

If you a worried about you or your pets after a treatment, a quick call to the poisons information line or the vet can give you peace of mind if you are worried about anything

Monday, February 8, 2021

Car Detailers Brisbane

What is the difference between using a hand wash or a car wash for your car?

In choosing whether to make use of  a car wash or hand wash for your car, one can actually find it pretty much difficult to choose. 

Either ways whatever the choice is, it's not necessarily the wrong or right choice. 

Making a choice is dependent on a lot of factors ranging from personal preferences to costs and so on. 

But then, in determining which is preferable, it is important we actually know the difference in either having a car wash or a hand wash as having the knowledge will aid in making the decision process easier.  Here are a few conditions to be considered:


  • TIME CONSTRAINT: One major and noticeable difference between using a hand wash or a car wash is the speed that is, the time taken. It literally takes less than 10mins to have your car washed using the automatic car wash as compared to the hand wash. Hand washing could take from 30mins to 1 hour or more.

  • ECO-FRIENDLINESS: In this day and age, it is important to consider the option which is environmentally friendly. With increased awareness about environmental safety, we should decide on either the car wash or the hand wash based on that which is more friendly to the environment. Well, as you may have already figured out, that option is  the car wash.  As much as we want to enjoy the fun of having to wash our cars in our driveways, it is key we do not forget that those grease, oils and contaminants can make the environment look messy and even end up in our water supply system, causing environmental pollution. This can pose as a health risk to us, our families and neighborhood generally. 

  • GENTLENESS: Well, many people tend to believe that hand washing your car is actually more gentle  than automatic car washing. There are no spiky brushes rubbing against the car and scratching the paint. This may seem true but then, there are a lot of conditions in getting that very gentle wash for your car, because there are literally no fewer than six steps to do it. From getting four buckets , to having multiple sponges, and so on. It requires a whole lot of processes that require one's patience.

  • EFFECTIVENESS: This is definitely a no-brainer. Car wash ensures you rid your car of all the grime and dirt. The automatic power hoses get into areas your hands cannot. Irrespective of the automatic car wash technique one uses, it gives your car that extra cleanliness as compared to hand washing. Along with the water shooting out of the jets, those machines are going to blast away the dirt and rinse it right off, leaving your car almost unblemished.

  • COST EFFECTIVE: Looking at which is more economical and cost friendly, one cannot really say as prices of having an automatic car wash varies accordingly and also is dependent  on the number of persons washing the car. Going the hand washing way, you need to have a couple of things like a good, car cleaner, rag, bucket , towels e.t.c and if you want a thorough job, then you'd be considering getting microfiber towels, de- ironer, glass cleaner, to mention but a few. If one is willing to get these equipment then it's great because these can be used for several other things.

  • CONVENIENCE: It is pretty much obvious that when it comes to convenience, automatic car washing is the best bet. I can assure you that you won't get tired at all getting a machine to wash your car because well, you're not the one washing afterall. Having a car washed can simply be done from your comfort zone as you just need to drop off your car and wait a couple of minutes and viola!  All done and set. Simply trouble-free and expedient. Whereas having a hand wash could literally take your time for that day, leaving you with other piled up work to settle. 


Going through the carefully highlighted differences, it is pretty much obvious that having a car wash has more pros compared to the traditional hand washing method. 

That is why we have provided the best service for your car detailing right here in Brisbane.
At Car Detailers Brisbane,we help you get your car well cleaned in swift time, leaving it as good as new.

Contact us today and see what we can do!